Rolling your own Synology NAS
My Synology DS215j is a great little machine, and has been chugging along without issue for nearly 3 years. Being one of the least-expensive Synology NAS units, it’s also one of the least capable. It’s slow (but not sluggish), has limited memory, and some of the software available to bigger and badder units is not installable on the lesser units. None of this is an issue per se. It’s actually expected given the cost of entry.
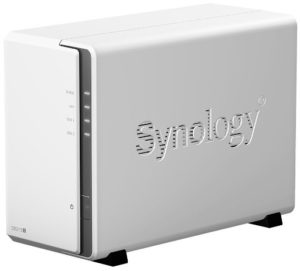
Synology DS215j
Even with its limitations, at around $179 (in 2015) for a 2-bay NAS, Synology’s budget NASes a great deal for the home. The newer DS218j is similarly-priced and has upgraded specs. It’s worth a look if you need basic features. My needs have recently outgrown what my basic NAS can provide.
I am a relentless tinkerer and I remembered seeing that Synology’s DSM OS is based on Linux and parts of it are open source. This means that, at least in theory, it’s freely available to put on whatever hardware I want.
When is a Synology not a Synology?
There is a project called XPEnology that is a port of DSM that you can run on lots of different bits of PC hardware. XPEnology doesn’t seem to have a definitive site but two that have good and current info are:
XPEnology.club even has some good advice:
For reliable operation of the DSM, you should buy the original product from the manufacturer!
If you are not yet familiar with Synology devices, it’s time to buy one!
If you’re new to Synology or just having a home or small business NAS this is perfect advice. Buy one. Do not make your own. Read no further.
That said, I do want to share my experience setting up an old PC and some spare hard drives to run DSM. It’s a fun exercise, but at the risk of spoliers early on, it’s not really worth the time or effort.
Where I started
I had a spare Dell Optiplex 780 lying around that I bought used a couple of years ago. It’s old. Like Core 2 Duo old. Despite its age, it’s a solid machine. I have a 120GB SSD installed and 8GB of memory, which I expanded to 16GB (its max) using some other leftover hardware. There are 3 SATA ports on the motherboard, but only 2 SATA power connectors, which presented a problem later on. Overall, it’s a decent basic machine and perfect for this experiment.
After doing some online reasearch about installing DSM on non-Synology hardware, it appears the easier route is to virtualize DSM as a guest OS rather than having it run a on “bare metalâ€. This just simply means I will need a virtual machine manager. I dubbed the project “FrankeNASâ€.
I chose Linux Mint as the host OS since I’m familiar with it and it’s free to install. And I went to my virtual machine manager of choice: VirtualBox.
Getting my Proof of Concept
PLEASE NOTE: The instructions here are how I got my “proof of concept†set up. Many of these practices are bad security and would be dangerous for a machine that I plan to use live. That wasn’t the intention here. I merely wanted to get things working. If I decided this was going to be set up for “production†use, I would start over and use more secure settings.
Here are the steps I took to get things going:
- Boot machine into BIOS
- Verify all hardware happy and recognized
- Verify virtualzation enabled (this is critical to get 64-bit support for the guest OS)
- Install host OS (Linux Mint 18.3 64-bit)
- Set up frankenas user as administrator
- Set up frankenas user to auto log in (very bad idea if you want good security)
- Install latest version of VirtualBox
At this point, I verified the machine boots into the desktop correctly and everything appears to be running fine with a stable and updated host OS.
- Set up a new virtual machine according to the instructions here: https://xpenology.club/install-dsm-6-1-on-virtualbox/
- I used 2 CPUs and 10GB of memory (this leaves 6GB for the host OS, which is more than enough)
- NOTE:Â The virtual machine actually needs BRIDGED networking, not NAT as those instructions say
- Boot the virtual machine
- Wait approximately 3-4 minutes for it to fully boot
- Visit http://find.synology.com and follow the Instructions
- This “finds†the machine on your local network
- Once found, follow the instructions to install DSM
- Once DSM is installed, boot the virtual machine.
- Note the IP address of the Virtual machine and go to http://[ipaddress]:5001
- Using the web interface to DSM, play around and install a few applications
- Attempt to log into my Synology account
And this is where the major issue with running Synology’s DSM on your own hardware cropped up.
How Synology locks it down
I couldn’t log into my Synology account from the FrankeNAS. I just kept getting a bunch of generic errors. So I poked using Google around and found out the main issue is that Synology requires the MAC address of the network card(s) and a valid serial number, which are tied together, in order to log into your account. This is part of the Synology hardware.
This approach makes a lot of sense and I applaud Synology for having some protection in place to make sure things are running on genuine Synology hardware. But it gets in the way of people like me experimentally hacking things together.
I did some more research and there are ways around this. But these sneaky ways to fake out Synology also involved editing very low level files in a boot loader in a virtual machine, trying to find a “valid†serial number / MAC address combo and a few other things that frankly seemed like a lot of work. I even had an idea that you could purchase an older used Synology as a donor, and use the Serial Number and MAC address from it but didn’t try that.
Ultimately, I decided to just see what the machine was capable of without logging into my account. you can do quite a bit, in fact.
It’s not really that bad
Any NAS is going to need storage (AKA hard drives). I originally had no larger hard drives installed on the FrankeNAS hardware. I had 3 2TB hard drives of various vintages lying around. Due the lack of SATA connectors (I had three, but one is in use already) and the lack of power rails (I had two for SATA, but one was already in use) with some cobbling, I was only able to get two of the 2TB hard drives working. This was enough to set up a RAID 1 to mirror them. After configuring VirtualBox to hand over full control of the hard drives to the guest OS, things were working pretty smoothly. The FrankeNAS now had 2TB of storage.
As alluded to earlier, not being able to log into my Synology account limited some of the features of the Synology NAS (and the DSM OS) like being able to set up a “QuickConnect†ID and a few other things. Surprisingly, pretty much everything else worked. The major stuff like cloud syncing, the various “Station†apps, file sharing on my local network, reports, Drive, etc. all worked fine. The Core 2 Duo is no speed demon, but it was running circles around my old NAS.
I let it run a few days, transferred various files onto it. I didn’t move over to it (it’s not production ready) but was playing around, installing some of the packages forbidden to the DS215j, and really enjoying the speedier access to the DSM desktop, speedier loading, and a generally better experience.
Don’t trust old hardware
This was an experiment done on a budget of around zero dollars using leftover hardware. As such, no real reliability was expected. And sure enough, after a few days, one of the hard drives (which is close to 8 years old) started throwing errors. It was still working, but the FrankeNAS was detecting errors and popping up all sorts of warnings.
I did some quick math and knew that anything I decided to do for real would need new hard drives (Synology or FrankeNAS) but I would still need a main server. Even something relatively small but capable enough to run a NAS would cost $200 – $300 and take several hours to get set up, secured and running only the bare minimum of things. This is when I decided it was a fun experiment, but the price of a newer faster NAS (around $400 for a really nice one) wasn’t punitive considering that it would work well right away, not require hours of additional tinkering, and not be a cobbled-together bunch of hardware and software with no support.
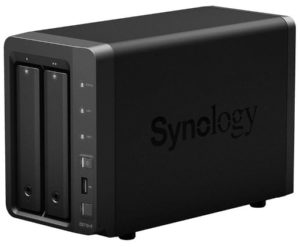
Synology DS718+
Get new hardware
I opted for a Synology DS718+, which is one of their flagship “plus” models. This thing’s got a 4-core Celeron and can handle up to 6GB of memory. Even though it’s only got two drive bays (expandable to seven) it’s stout as is, even if the SSD caching is effectively useless. Given that 4TB drives hover just under $100 on sale, this was a fairly inexpensive upgrade. Having 4TB of redundant storage and a dedicated server for under $600 is a helluva deal.
Another nice bonus is the form factor. The FrankeNAS is a large machine and would needed external drives on it, whereas the DS718+ is about the size of a medium loaf of bread. The FrankeNAS also would use a lot more power than the DS718+.
In the long run it was a better value proposition to have the real thing.